
Lesson Plan: Unit - 07
Subject: P15A2AAD - Android Application Development
Topic of Study: Building Web Extensions using WebKit
Grade/Level: Master of Computer Applications
Objective: Building Web Extensions using WebKit
Time Allotment: 55 Minutes
Subject: P15A2AAD - Android Application Development
Topic of Study: Building Web Extensions using WebKit
Grade/Level: Master of Computer Applications
Objective: Building Web Extensions using WebKit
Time Allotment: 55 Minutes
- Building Web Extensions using WebKit
- All HTML rendering on the Android platform is done using the WebKit rendering engine.
- The android.webkit package provides a number of APIs for browsing the Internet using the powerful WebView control.
- The most helpful classes of the android.webkit package are
- The CacheManager class gives you some control over cache items of a WebView.
- The ConsoleMessage class can be used to retrieve JavaScript console output from a WebView.
- The CookieManager class is used to set and retrieve user cookies for a WebView.
- The URLUtil class is handy for validating web addresses of different types.
- The WebBackForwardList and WebHistoryItem classes can be used to inspect the web history of the WebView.
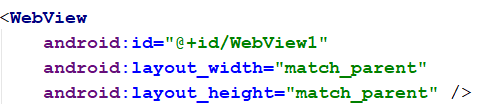
- The WebView control can be added to a layout resource file like any other view.
- It can take up the entire screen.
- The Eclipse/Android Studio Layout Resource Editor does not display the WebView control properly.
- Exa.
- Loading Content into a WebView Control
- Way - 01 You can load content into a WebView control in a variety of ways.
- To view specific website
- Exa.

- Way - 02 To render raw HTML content. (from assets directory)
- Exa.
- Step 01:

- Step 02:

- Step 03:

- Way - 03 If, instead, you want to render raw HTML, you can use the loadData() method:
- Input Exa.

- Output.

- Adding Features to the WebView Control:
- Unfortunately, not all websites are designed for mobile devices.
- To setting the initial scale of the control, like this: wv.setInitialScale(30);
- The call to the setInitialScale() method scales the view to 30 percent of the original size.
- By default, all the WebView control does is display the web content provided by the developer using its internal rendering engine, WebKit.
- You can use three classes, in particular, to help modify the behavior of the control: the WebSettings class, the WebViewClient class, and the WebChromeClient class.
- Modifying WebView Settings with WebSettings:
- By default, a WebView control has various default settings: no zoom controls, JavaScript disabled, default font sizes, user-agent string, and so on.
- You can change the settings of a WebView control using the getSettings() method.
- The getSettings() method returns a WebSettings object that can be used to configure the desired WebView settings.
- Some useful settings include
- Enabling and disabling zoom controls using the setSupportZoom() and setBuiltInZoomControls() methods.
- Enabling and disabling JavaScript using the setJavaScriptEnabled() method
- Enabling and disabling mouseovers using the setLightTouchEnabled() method
- Configuring font families, text sizes, and other display characteristics
- Handling WebView Events with WebViewClient:
- The WebViewClient class enables the application to listen for certain WebView events, such as when a page is loading, when a form is submitted, and when a new URL is about to be loaded.
- You can also use the WebViewClient class to determine and handle any errors that occur with page loading.
- You can tie a valid WebViewClient object to a WebView using the setWebViewClient() method.
